What Are Tubeless Bike Tires? The What, Why, and How of Tubeless
You may have heard the term “tubeless” mentioned online or among the people you ride with. But what does it mean? For more than a hundred years, bike tires used butyl rubber tubes to keep them inflated and on the rim — and many still do. But modern technology allows riders to ditch the tubes.
It’s a proven idea: cars have been using tubeless tires for decades. Tubeless designs first arrived in the bike world on mountain bikes, reducing flats and improving traction. In recent years, tubeless has found its way into gravel and even road cycling.
Interested in going tubeless? Read on to learn what it is, the pros and cons, and even how set up tubeless tires.
WHAT IS TUBELESS, ANYWAY?
A tubeless setup uses special tires and rims designed to create an airtight seal.
Tubeless-ready rims feature a deep center channel for easy tire installation and removal, as well as a high bead seat shelf to lock the tire’s specially shaped bead to the edge of the rim. Most tubeless systems also use tubeless-specific tape and air valves to seal the spoke holes and valve hole. The finishing touch is the tubeless sealant that’s added to the inside of the tire. This fills any small gaps and seals small punctures when riding to prevent flats.

Most tires and rims that meet these criteria are labeled “tubeless ready” or “tubeless compatible." Check with the manufacturer if you’re not sure. Tire and rim bead shapes may vary slightly by manufacturer, but they all adhere to the standards of the ETRTO (European Tire and Rim Technical Organization). This means that tubeless-ready rims and tires from different makers are generally cross-compatible.
WHY SHOULD I GO TUBELESS?
Tubeless setups come with many benefits:
- Fewer flats – Tubeless tires virtually eliminate the “snakebite” flats that occur when a tube is pinched between the tire and rim. Tubeless sealant also fills many of the punctures caused by road debris such as glass, wire, tacks, etc.
- More traction – Tubeless setups let you run lower tire pressure without fear of flats. Lower pressure means a larger contact patch (more of your tread touching the ground), which boosts traction.
- Better ride quality – Lower tire pressure also means your tire can absorb many of the bumps on the road and trail. This cushion creates a comfortable ride quality that feels like floating.
- Lower weight – If you’re currently using wire-bead tires and standard tubes, a tubeless setup will likely shave some weight. Keep in mind that tubeless tape, valves, and sealant all add weight, so if you’re already using lightweight tires and tubes, you may not see a big difference.
Like anything, there are a few tradeoffs in switching to tubeless:
- More expensive – Even if you already have tubeless-ready rims and tires, the cost of sealant, valves, tubeless tape, and professional installation adds up.
- Messier – While tire sealant is the lifeblood of a tubeless system and has saved countless rides, it inevitably gets everywhere when changing tires or installing an emergency tube. A sizeable puncture on a ride can also spray sealant on you and your bike, leading to extra cleanup.
WHAT ELSE SHOULD I KNOW ABOUT TUBELESS?
While tubeless setups greatly reduce flat tires, they can still happen. A tubeless tire plug kit and a spare tubeless valve will cover most mid-ride repairs, but it’s wise to carry a spare tube just in case. The sealant in your tires will also dry out over time. It’s a good idea to check and top off your sealant if needed once every 2–3 months; this varies based on how much you ride, your local climate, and how much sealant you add (follow the sealant manufacturer’s recommendations).
HOW DO I GO TUBELESS?
If you’re sold on the benefits of tubeless and ready to make the switch, read on for our step-by-step guide.
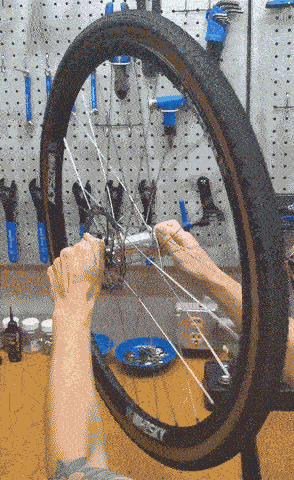
First, make sure you have tubeless-ready rims with tape and valve installed — most tubeless-ready wheels come like this, but your local shop can install them if not. Our Tubeless Tape and Tubeless Valves are designed to work perfectly together for an easier setup.
You’ll also need tubeless-ready tires. If you don’t have a set, take a look at our gravel, road, and mountain tire offerings.
You’ll want these items handy for your tubeless setup:
- Tire lever
- Tubeless tire sealant
- Sealant injection tool (optional)

Step 1: With the wheels removed from your bike, place the wheel completely inside the tire, ensuring that the tire rotation matches the direction of wheel travel.
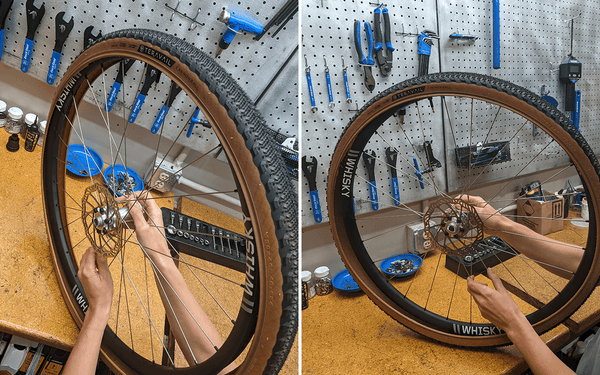
Step 2: Push one side of the tire bead into the rim’s center channel by slowly edging the tire on as you work around the wheel. This step can be a little bit tricky — make sure that the tire bead is in the center channel all the way around, as this helps the tire go on more easily without a tire lever.

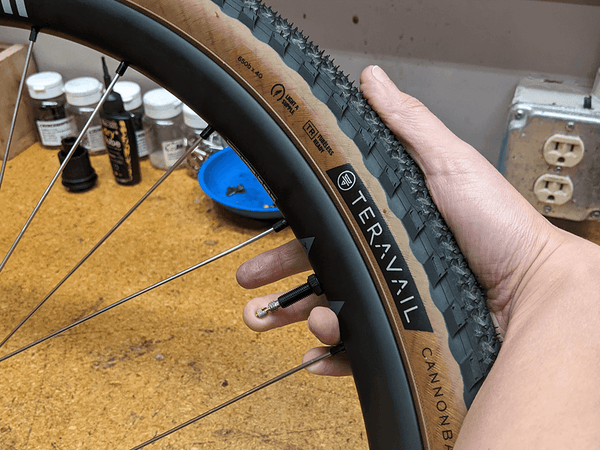
Step 3: Flip the wheel over and begin pushing the other side of the tire onto the rim (this is easier if you start on the side opposite the valve stem). Stop once you have about ¾ of the tire onto the wheel, leaving the rest unmounted (you’ll use this opening to add your sealant). If you have a sealant injector, you can mount the tire all the way around.
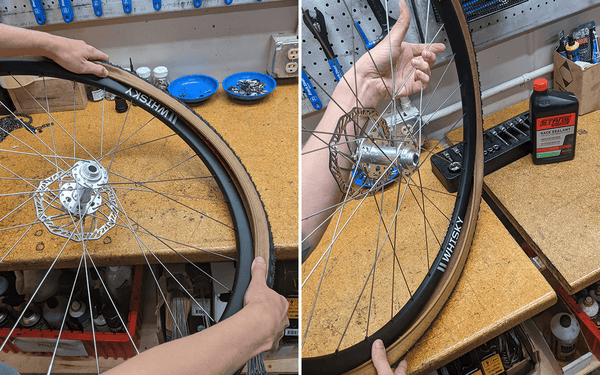
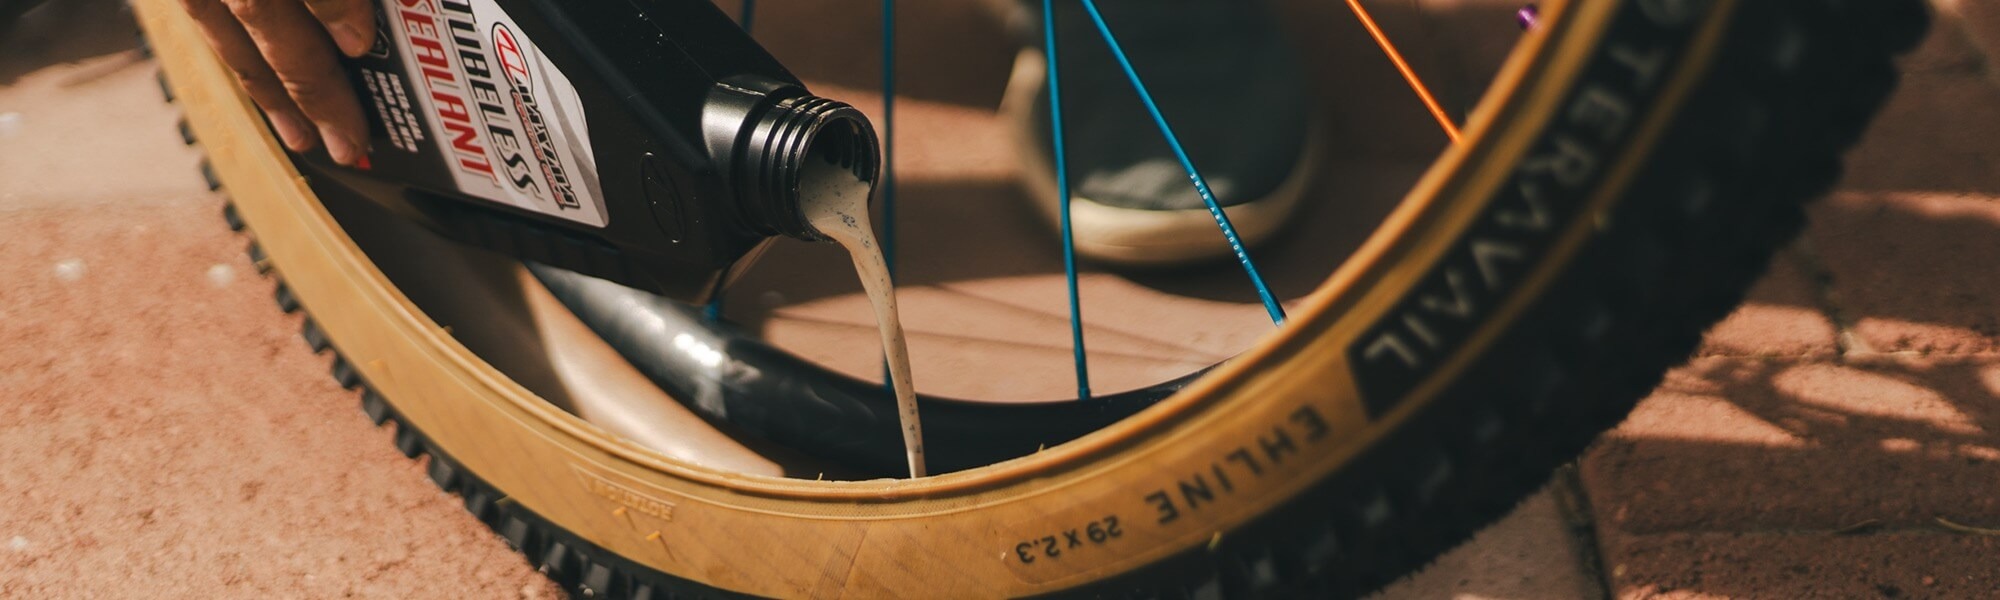
Step 4: Add your sealant based on the manufacturer’s directions. If you’re using a sealant injector, add sealant through the valve stem. Otherwise, pour sealant into the tire and push the remaining section of tire onto the wheel to close the opening, being careful not to spill any sealant.
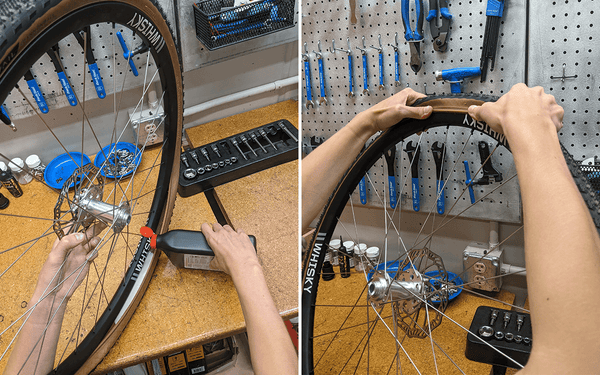
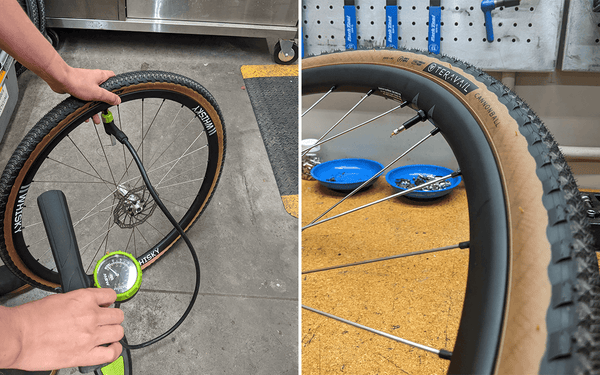
Step 5: Once both sides of your tire are on the rim, spin the wheel gently a few times to let the sealant coat and lubricate the inside rim wall (this will make inflation easier).
Step 6: Now it’s time to inflate the tire. Put on ear and eye protection before moving forward with this step, as compressed air is a hazard and blow-offs can occur. A floor pump is often good enough here, but an air compressor makes the job much easier. Add air until the tire seats on the rim. You will likely hear popping sounds from your tire — this is the sound of the tire bead setting up into the bead shelf, and it’s totally normal. Continue to inflate your tire until the bead indicator (the line in the sidewall above the tire bead) sits just above the edge of the rim all the way around the tire on both sides of the wheel.
Note: Avoid overinflating the tire or adding too much air too quickly. This can lead to higher air pressure than the tire was designed for (check the PSI range printed on the sidewall). This can cause the tire to blow off the rim, which may permanently damage the tire and cause injury.
Step 7: Once the tire is seated, rotate the wheel to distribute sealant throughout the tire and rim. Release air from the tire until it’s well within the recommended range printed on the tire’s sidewall.
There you have it: seven steps to a whole new ride experience. If you don’t feel confident about any part of the process above, or have trouble along the way, your local bike shop is equipped (and happy) to help you out.